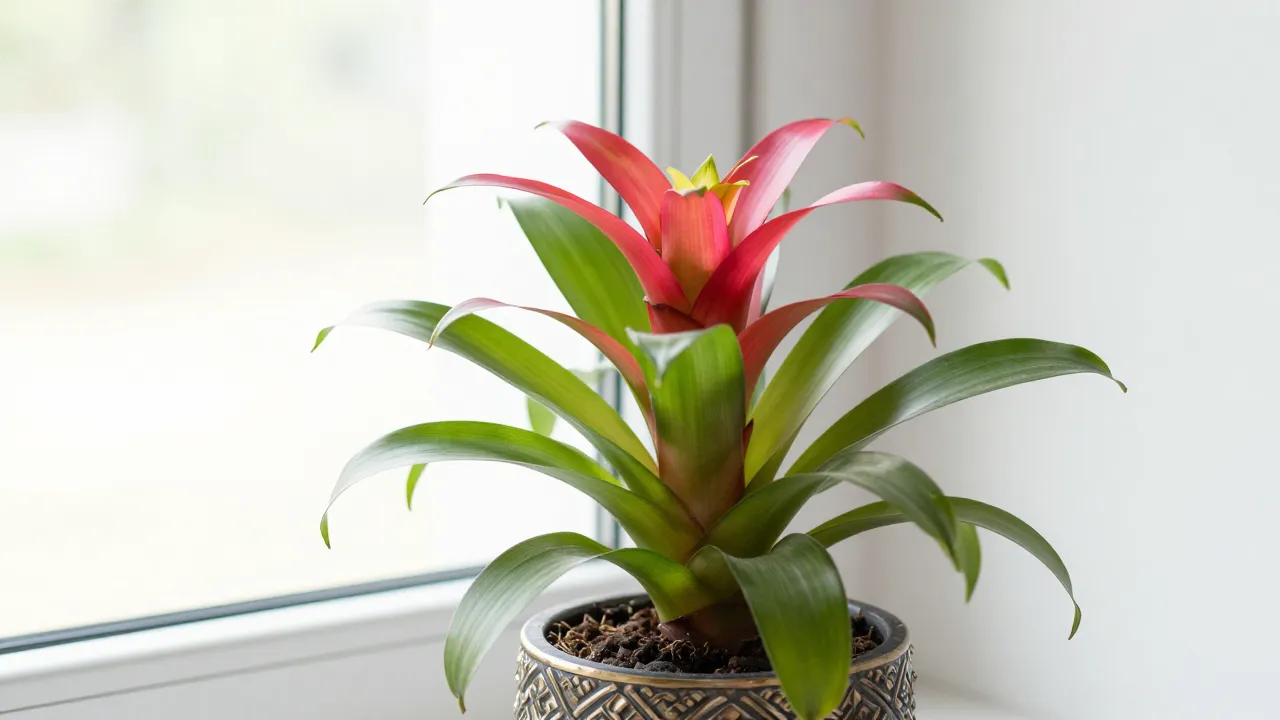
Bromeliads are among the most striking and rewarding plants you can grow, whether indoors or outdoors. Known for their bold foliage, vibrant bracts, and exotic appearance, the bromeliad plant brings a tropical feel to any space with surprisingly minimal effort. While they may look intimidating to beginners, bromeliads are actually low-maintenance once you understand their basic needs.
In this comprehensive guide, you’ll learn everything you need to know about how to grow and care for a bromeliad plant, from ideal growing conditions and watering techniques to propagation, common problems, and long-term maintenance.
Table of Contents
Understanding the Bromeliad Plant
The bromeliad plant belongs to the Bromeliaceae family, which includes over 3,000 species. Popular varieties include Guzmania, Aechmea, Vriesea, and Tillandsia (air plants). Most bromeliads are native to tropical and subtropical regions of Central and South America, where they thrive in warm, humid environments.
One of the most fascinating features of bromeliads is their rosette-shaped growth pattern, which forms a central “cup” or “tank.” In nature, this cup collects rainwater and nutrients, helping the plant survive in tree canopies or rocky environments. Many bromeliads are epiphytes, meaning they grow on other plants or surfaces without being parasitic.
Bromeliads are also known for their long-lasting flowers, which are actually colorful bracts that can remain vibrant for several months. While each bromeliad plant flowers only once in its lifetime, it produces offsets—commonly called “pups”—that allow the plant to continue growing for years.
Ideal Growing Conditions
Creating the right environment is the key to healthy bromeliad growth. While different species have slightly different needs, most bromeliads share similar preferences for light, temperature, and humidity.
A. Light Requirements
Light plays a major role in bromeliad care. These plants prefer bright, indirect light, which closely mimics the filtered sunlight of their natural habitat.
- Place indoor bromeliads near an east- or south-facing window
- Avoid harsh, direct sunlight, which can scorch the leaves
- Low light may result in slow growth and dull leaf color
A good rule of thumb is to observe the leaves:
- Pale or bleached leaves indicate too much light
- Dark green, elongated leaves may signal insufficient light
Some bromeliads with softer, greener leaves prefer lower light, while those with stiff, spiny, or colorful foliage often tolerate brighter conditions.
B. Temperature & Humidity
Bromeliads thrive in warm temperatures and moderate to high humidity.
- Ideal temperature range: 65–85°F (18–29°C)
- Avoid temperatures below 55°F (13°C)
- Protect from cold drafts and sudden temperature changes
Humidity is equally important, especially for indoor plants. Aim for 40–60% humidity by:
- Using a humidifier
- Grouping plants together
- Placing the plant on a pebble tray with water
Bathrooms and kitchens often provide excellent environments for bromeliad plants due to naturally higher humidity levels.
Planting and Potting
Choosing the right pot and soil is essential for successful bromeliad care. Since bromeliads are prone to root rot, excellent drainage is non-negotiable.
Soil Requirements
Use a well-draining potting mix, such as:

- Orchid mix
- A blend of bark, perlite, and peat moss
- Cactus mix amended with bark
Avoid heavy garden soil, which retains too much moisture and can suffocate the roots.
Pot Selection
- Choose a pot with drainage holes
- Bromeliads have small root systems, so shallow pots work well
- Clay pots are ideal as they allow moisture to evaporate more easily
When planting, position the bromeliad so the base sits just above the soil line. Firm the soil gently—never pack it tightly.
Watering Guidelines
Proper watering is one of the most important—and often misunderstood—aspects of bromeliad plant care.
Watering the Central Cup
Most bromeliads should have their central cup filled with water at all times.
- Use rainwater, distilled, or filtered water if possible
- Replace the water every 1–2 weeks to prevent stagnation
- Empty the cup occasionally and refill with fresh water
Watering the Soil
- Water the soil lightly when the top inch feels dry
- Never allow the plant to sit in soggy soil
- Reduce watering during cooler months
Overwatering is a common cause of failure. Yellowing leaves, a mushy base, or foul odors are signs that the plant is receiving too much water.
Fertilizing the Bromeliad Plant
Bromeliads are light feeders and do not require heavy fertilization. Too much fertilizer can damage the plant or reduce flowering.
Fertilizer Tips
- Use a balanced liquid fertilizer diluted to ¼ strength
- Apply once every 4–6 weeks during the growing season
- Avoid fertilizers high in copper, which is toxic to bromeliads
Fertilizer can be applied to:
- The soil
- The central cup (lightly)
- As a foliar spray
Never fertilize during winter dormancy or when the plant is stressed.
Pruning and Maintenance
Bromeliads require minimal pruning, making them ideal for low-maintenance plant lovers.
Routine Care
- Remove dead or damaged leaves with clean scissors
- Trim spent flower stalks once the bloom fades
- Wipe leaves gently to remove dust and improve photosynthesis
Once the mother plant finishes flowering, it will slowly decline. This is a natural part of the bromeliad life cycle and not a sign of poor care.
Common Problems and Solutions
Even with proper care, bromeliad plants can occasionally encounter issues. Early detection makes all the difference.
A. Pests
Common bromeliad pests include:
- Mealybugs
- Scale insects
- Spider mites
Solutions:
- Wipe leaves with a cotton swab dipped in rubbing alcohol
- Use insecticidal soap or neem oil
- Isolate affected plants to prevent spread
B. Diseases & Issues
Root Rot
- Caused by overwatering or poor drainage
- Remove affected roots and repot in fresh, dry soil
Leaf Browning
- Often due to low humidity or mineral-rich water
- Increase humidity and switch to distilled water
No Flowering
- Bromeliads bloom only once
- Insufficient light can delay blooming
Propagating Bromeliad Plant
Propagation is one of the most rewarding parts of bromeliad care. After flowering, the mother plant produces pups at its base.
How to Propagate Bromeliad Pups
- Wait until pups are ⅓ to ½ the size of the mother plant
- Use a clean, sharp knife to separate them
- Allow the cut surface to dry for a day
- Plant pups in a well-draining potting mix
- Water lightly and keep in warm, bright conditions
With proper care, pups will mature and eventually produce their own stunning blooms.
Benefits of Growing Bromeliad Plant
Growing bromeliads offers both aesthetic and practical benefits.
- Adds vibrant color and tropical appeal
- Low-maintenance and beginner-friendly
- Improves indoor air quality
- Long-lasting blooms
- Excellent houseplants for apartments and offices
- Non-toxic to pets (most varieties)
Their architectural form makes bromeliads standout statement plants in any indoor or outdoor garden.
Conclusion
Learning how to grow and care for a bromeliad plant is simpler than it appears. By providing the right light, warmth, humidity, and watering routine, bromeliads can thrive for years and continuously produce new plants through propagation. Their unique structure, bold colors, and minimal maintenance needs make them a favorite among plant enthusiasts of all experience levels.
Whether you’re looking to brighten your home or expand your plant collection with something truly eye-catching, bromeliads are a rewarding and resilient choice. With the guidance in this article, you’ll be well-equipped to enjoy healthy, vibrant bromeliad plants year after year.

